


winPenPack and Java
 | winPenPack and JavaClarifications about the use of X-Software based on Java technology |
Preface
Some X-Software based on Java technology (
 X-ArtOfIllusion
X-Datacrow
X-DirSyncPro
X-Domination
X-Freemind
X-Frinika
X-GenealogyJ
X-GEONExT
X-HattrickOrganizer
X-ImageJ
X-Jampal
X-Jarnal
X-JClic
X-JDavide
X-jEdit
X-Jext
X-Jrdesktop
X-Jreepad
X-JstencilReport
X-Makagiga
X-muCommander
X-OmegaT
X-OpenModelSphere
X-Openproj
X-PDFsam
X-PowerArchitect
X-RSSOwl
X-StoryBook
X-SweetHome3D
X-TuxGuitar
X-BlogBridge
X-Eclipse
X-GeoGebra
X-OpenOffice
X-ThinkingRock see list) for a proper use these programs need Java Runtime Environment (JRE).
Anyhow, as "X-Software" packaging, they can be used on a USB pendrive or directly on your Hard Disk, without Java directly installed on the hosting PC. To achieve this, you can follow two different procedures, one automatic and one manual.
Note: here below you can see references to a folder containing Java called "\Lib\Java". This means: if we talk about a single X-Software you can reach this folder in "X-Software_name\Lib\Java" path, otherwise if we talk about a pack, you can reach this folder in "winPenPack\Lib\Java" path. However, referring on this tutorial point of view, the two paths are absolutely equivalent (remember: if you make these modifications in a pack structure, this new java installation/configuration is valid for all X-Software whom use it).
Running JavaGet with automatic procedure
Since we created java based X-Software (hereafter named X-Software-J) we implemented a manual procedure quite simple to understand but not really "user friendly" for newbies. For this reason and also for a series of actions aimed at project modernization, expecting the automation and/or streamlining in some procedures, the Team has created a new winPenPack utility: JavaGet. This program, now contained in each X-Software-J and in each pack, manages automatic installation or upgrade of the Java Runtime Environment (JRE) directly in the \Lib\Java folder. This to avoid You all of operations required by the manual procedure (shown here below for advanced users only).
The following steps can only occur when there is an active Internet connection or you do not have problems with connection speed or bandwidth.
In this case:
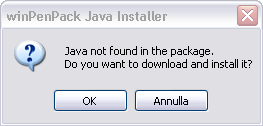
- Execute one of the X-Software-J prepared with JavaGet (available on our site since December 2009/January 2010). If there is no Java Runtime Environment (JRE) in \Lib\Java directory, appears the following warning:
Note: sometimes it might appear this other error message: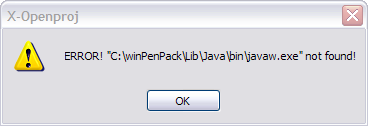
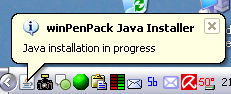
This means the JRE is not present and the X-Software-J is not updated to the latest version prepared with JavaGet and so was downloaded from our site before December 2009. In this case is suggested re-download the updated version from our download section, or, alternatively, follow the manual procedure as below. - Confirming with OK, will start the download of the latest version of Java. On the tray bar You will see a progress status indicator:

- At the end of download, JavaGet will extract the files in "winPenPack\Lib\Java\bin" and "winPenPack\Lib\Java\lib" folders, delete the setup file (not necessary anymore) and run the X-Software-J.
- After this point, X-Software-J will run normally. You will have the same behaviour also if this operation will be applied in the packs; in this case, all X-Software-J present in the pack will use the last Java release.
Special instances and Update
There are some cases where it is not possible to use the above procedure.
Just to mention some examples:
- the user, when starts the X-Software-J, has not an Internet connection available (but he must have the JRE installer already downloaded);
- the user has a internet connection filtered by proxy or the download requires the use of a download manager;
- the user wants to perform a java installation in multiple packs or in more standalone X-Software-J (i.e., not installed in the pack, but self contained in different folders, one per program).
In these cases:
- You must download the installer from this page (You must click on the "arrow" icon and then OK on the warning window). After that, You can copy it in the "\Lib\Java\setup" folder.
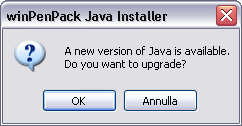
- Then, You need to run a X-Software-J already patched with JavaGet (present on our site since December 2009/January 2010). You will see the following warning:
- Confirming with OK, JavaGet will be activated as shown in the picture:
- JavaGet will extract the files in "winPenPack\Lib\Java\bin" and "winPenPack\Lib\Java\lib" folders, delete the setup file from the "\Java\setup" folder (not needed anymore) and run the X-Software-J.
- After this point, X-Software-J will run normally. You will have the same behaviour also if this operation will be applied in the packs; in this case, all X-Software-J present in the pack will use the last Java release.
Note 1: pratically, this installation procedure allows to upgrade the JRE, though not completely automated, because needs a first step by the user (Java downloading and positioning in a defined folder). However, this is actually the best compromise between "ease of use" and deployment. Moreover, it allows to keep (if You want) an older version of Java running on particular or very old systems.
Note 2: due to the fact Java setup file will be deleted from the "\Java\setup" folder at the end of the update, if You need multiple installations, will be a good practise save a copy in a different dedicated folder.
Note 3: using this steps, JavaGet takes care of backup and recovery of any previous Java version already present (in the pack or the X-Software-J) if the update procedure will incorrectly ends.
Manual procedure (only for expert users)
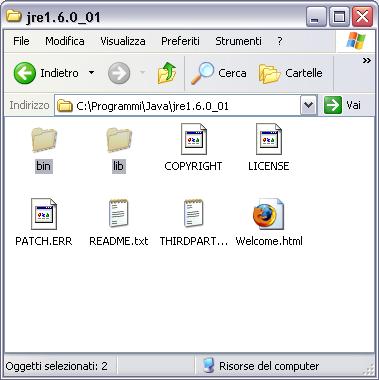
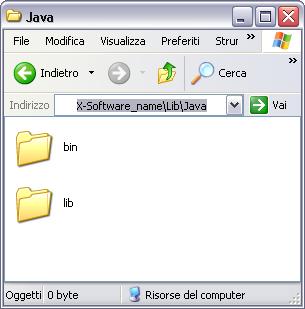
- First of all You must verify if, in the path C:\Program files\Java\ of your PC, is already present an installation of JRE. In this case You need only to copy the folders named "bin" and "lib" already present in the folder "C:\Program Files\Java\jreXX" (see picture 1), into the folder "\Lib\Java" (see picture 2).
- If any JRE installation is present, You must download the installer and perform a normal installation on your PC. After this step, You must copy the "bin" and "lib" folders present in "C:\Program Files\Java\jreXX", into "\Lib\Java" folder, as already shown at previous point. At this point, You can uninstall the JRE from your PC using normal procedure through the Windows Control Panel, If You want.
- Once one of the above described operations has been completed, You can start the X-Software using the X-Software_name.exe file (i.e. X-Freemind.exe).
Note: the folder "\Lib\Java" can be used by more X-Software. So, if in the winPenPack "Lib" folder are already present the "bin" and "lib" Java folders, or if You run the programs from a pack (where JRE is already included), You don't need to re-install it anymore. In fact, the Java "installation" present in "\Lib" folder will be used by all X-Software requiring it.
Picture 1. this is the PC folder containing Java after a normal plain installation:
Picture 2. this is the destination folder where Java will be copied into (X-Software_name\Lib\Java):

Copyright © winPenPack 2005-2023 - All rights reserved
Powered by e107 website system | winPenPack License Agreement
Terms of Use | Privacy Policy

Powered by e107 website system | winPenPack License Agreement
Terms of Use | Privacy Policy