How to merge two or more winPenPacks
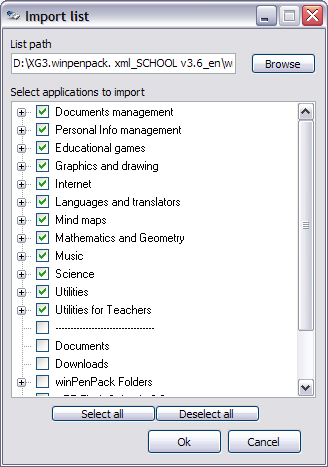
Once you have selected the file, the Import list window appears again, now listing all the wPP_Flash School menu items.
Select all the categories you want to import and click OK: these items will be added after all the other menu items already listed on Mega suite menu.
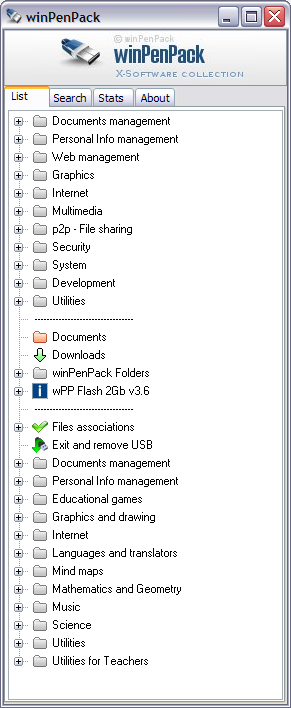
Warning: sometimes, depending on where you right-clicked, the imported items may be listed in a subcategory of the menu, rather than at the bottom of the main menu. If it happens, all you have to do is browse through the sub-folders to find them, and then drag-and-drop them in the main list with your mouse. This usually happens when you right-click and a category, a sub-category or a folder has been left expanded in the List panel of the configuration window.
Once imported, you may drag-and-drop them with your mouse into an existing category/folder of your choice.
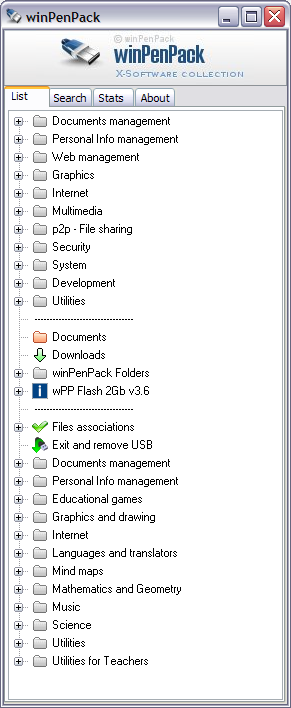
You may notice that some categories or programs are listed twice. This is because some categories and programs are present in both suites. But, since the two suites have been successfully combined, they now refer to the same contents, therefore one of the two becomes redundant and can be safely deleted. If you delete all programs contained from a category, you can safely delete the category, too.
Sometimes you can see that the same program can be found in two different categories in the both suites. This is because the Flash School suite is student-oriented and uses different students-friendly categorizations.
If you wish to avoid checking each category manually to delete double programs one by one, you can opt for an easy alternative (it will not affect your Mega suite in any way): create a new category named School applications and drag-and-drop all the categories from the Flash School suite (those listed in at the bottom of of the List panel) into it.
Here follows a more detailed explanation.
Right-click on an empty space on the list to open the option window and select the Add category option. The Properties window will open:
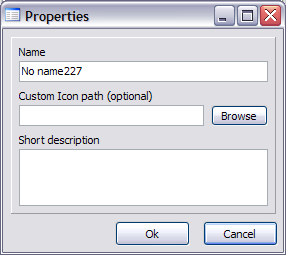
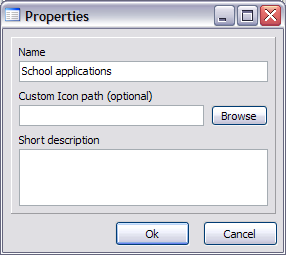
In the Name field, highlight the (No nameXXX) text and type in 'School applications':
 |
Select all the categories you want to import and click OK: these items will be added after all the other menu items already listed on Mega suite menu.

Warning: sometimes, depending on where you right-clicked, the imported items may be listed in a subcategory of the menu, rather than at the bottom of the main menu. If it happens, all you have to do is browse through the sub-folders to find them, and then drag-and-drop them in the main list with your mouse. This usually happens when you right-click and a category, a sub-category or a folder has been left expanded in the List panel of the configuration window.
Once imported, you may drag-and-drop them with your mouse into an existing category/folder of your choice.

You may notice that some categories or programs are listed twice. This is because some categories and programs are present in both suites. But, since the two suites have been successfully combined, they now refer to the same contents, therefore one of the two becomes redundant and can be safely deleted. If you delete all programs contained from a category, you can safely delete the category, too.
Sometimes you can see that the same program can be found in two different categories in the both suites. This is because the Flash School suite is student-oriented and uses different students-friendly categorizations.
If you wish to avoid checking each category manually to delete double programs one by one, you can opt for an easy alternative (it will not affect your Mega suite in any way): create a new category named School applications and drag-and-drop all the categories from the Flash School suite (those listed in at the bottom of of the List panel) into it.
Here follows a more detailed explanation.
Right-click on an empty space on the list to open the option window and select the Add category option. The Properties window will open:

In the Name field, highlight the (No nameXXX) text and type in 'School applications':


